Tofu “Steaks” with Enoki Mushrooms, Bok Choy and Edamame

DSCN1046

I’m back. If you had forgotten I existed, you would be forgiven. It’s been four long months since I have posted a recipe, and I considered doing away with the whole thing. My work assignment this year has had me more-or-less chained to my bottomless ‘inbox’ of projects, reading assessments and other things to mark. But 2013 is here, and with it a resolution to try to have a slightly better work-life balance, and so I thought I would give this blog one more attempt – and what better way to do so than to start off the year with an easy work night dinner.

Disclaimer: This recipe is Japanese-inspired. I will not call it Japanese because a) I invented it, and b) I am neither Japanese nor am I particularly proficient in Japanese cooking. But it is ‘inspired’ by Japanese cooking because in the one Japanese cookbook I own, I see these flavours repeated almost without exception through many different recipes – a combination of soy, mirin and sake/rice vinegar with sesame oil.

This recipe came about as a result of a promotion on enoki mushrooms at Highland Farms one day. A new eco-friendly mushroom product from Ontario was featured and I picked up the 2-for-5-dollars packages to try – except that I had no idea what to do with them. They sounded Japanese, so I decided to mix them up with some ingredients I had on hand for a healthy, vegan and even gluten free (assuming you use gluten free soy sauce) meal. Voila! A new recipe was born.

This meal literally takes 10 minutes to make, and is the perfect meal for a busy week night dinner. Keeping the flavourings on hand means it’s easy to plan for. You will need a light soy sauce (like Kikkoman), mirin (which is a Japanese sweetener, available in most supermarkets – real mirin is much more expensive and can be purchased at Whole Foods or a Japanese grocer, but if you are only buying it for this recipe, the cheaper grocery-store kind will suffice), sesame oil, rice vinegar and sake (sake is optional. It is alcoholic, so for those of you who do not consume alcoholic products, rest assured – it is not necessary. I have made this several times without sake). Having peeled edamame in your freezer is also a good idea.

When you make this recipe, be sure to have everything washed and cut before you start cooking – the process goes very quickly once the heat is on.

Recipe (for two):

1 package of firm or extra firm tofu

salt

2 tbsp sunflower, canola or avocado oil

1/2 cup frozen, peeled edamame, boiled for 5-8 minutes

approximately 2 cm of fresh ginger, sliced finely (NOT grated)

2 shallots, halved lengthwise and then sliced

1 package of fresh enoki mushrooms, stemmed and washed

1 cup snap peas, stemmed

2 tbsp (approximately) light soy sauce

1 tbsp sake (optional)

2 tbsp (approximately) rice vinegar

1-2 tsp mirin

4 heads of baby bok choy, washed with ends cut off

1/2 tsp sesame oil

Instructions:

Prepare all ingredients as directed. Begin with tofu. Slice your block of tofu lengthwise so you end up with four “steaks.” Lightly salt each side and leave to rest while you heat up the oil in a flat bottomed fry pan. You can adjust the oil as you wish; I try to limit it to two tbsp, but if you want a crispier tofu steak, you may need to add more. When oil is hot, carefully place the steaks in the pan. Allow to fry lightly for a few minutes, and then carefully turn. The tofu steaks are done when they are just golden on both sides (again, this will vary depending on how much oil you choose to use). Remove the steaks and place on a paper towel to drain. Now, with the remaining oil still hot, add the shallots and ginger and toss rapidly for one minute. Add the enoki mushrooms and snap peas and continue to cook for one minute. Add the soy sauce, rice vinegar, mirin and sake (if using). Now, this is where I should qualify something: I use these ingredients ad lib – the amounts are estimates only. As a rough guide, you should use equal portions of soy and rice vinegar, but taste and adjust as necessary. Add bok choy and edamame last, and as soon as bok choy is wilted, remove from heat (be careful not to over-cook the bok choy – it will go soggy like spinach does). Place 1-2 tofu steaks on each plate, cover them with the stir fry, and divide the sesame oil by drizzling 1/4 tsp over each plate. Sometimes – depending on how hungry we are, I make some sticky rice or brown rice to accompany this meal, but most of the time it is filling on its own. Enjoy!


Leave a comment

Filed under dinner, Gluten free, vegan, Vegetarian

Whole Wheat Linguine with Heirloom Tomatoes and Cashews

I am back – after a very long hiatus! After a summer of travels – both near and far – I am ready to retire the travel blog for another year and re-focus on my other love: food. Our journey to Africa was not one that inspires great culinary experiments. We subsisted on some edible but pretty standard camp meals, most involving eggs, beans, rice or eggplant. A few times along the way, our camp cook whipped up some ugali and matoke with chapatis, which was nice to try – but let’s just say that East Africa is not where you go to unleash your foodie prowess. There is one exception to this, however, and it is Zanzibar – The Spice Island.

We arrived on Zanzibar – the magical island off the coast of Tanzania, in the Indian Ocean, during Ramadan. Most of Zanzibar’s inhabitants are Muslim, so the city of Stone Town was not really the usual bustling food centre that it is until after sun down. Many of the cafes and restaurants closed down during the day, and sometimes the ones that were open were hidden because the usual sprawl of tables and chairs over outdoor terraces was missing. We wandered the city – famished – on our first day, looking for anything open, and resolved that when we found it, we would refrain from being picky and just eat. As it turns out, the first restaurant we found was a very chic place serving ‘haute Belgian cuisine.’ Now, when I think of Belgium, the only thing that comes to mind as far as food goes, is chocolate and waffles. I was not particularly adverse to eating chocolate and waffles for lunch, except that ‘LouLou’s’ happened to have a menu of European foods of which I had not seen the likes for, oh, at least 30 days.  Now, I normally would have to rule out something like Belgian food in a place that specializes in a fusion of Arab, African and Indian flavours, but, like I said, I was hungry.

So we ordered a pasta that didn’t sound particularly Belgian to me: linguine with eggplant, cashews and tomatoes. And it was good. Really, really good. I don’t cook pasta much at home, except when in need of a fast and easy meal, but I have to say the whole idea of using cashews in pasta was quite intriguing, and so I pulled out my iPod and made a quick note of the flavours I could detect in the dish. What a surprise to taste something so lovely in a Belgian restaurant on an island in East Africa!

When we arrived home, we found a large basket of low-acid orange heirloom tomatoes at our local farmer’s market. I also had a pint of those awesome little green pattypan squash from Guatemala. And I thought: heirloom tomatoes, pattypan squash and cashews? Why not! So what follows is the very “summery” meal that we concocted, inspired by our so-called “haute Belgian cuisine in Zanzibar” experience. Pattypan squash are hard to find in the GTA. I’ve only ever seen them at the giant Loblaws at Maple Leaf Gardens. So if you don’t have them, use eggplant or zucchini. Eggplant might require a bit more oil and cooking time because its flesh tends to absorb a lot of your oil; zucchini will cook very fast and so you should reduce your cooking time. It’s also important on recipes like these that you don’t cheap out on the olive oil. Not all olive oil is created equally, and a very good quality, flavourful olive oil is necessary for this one, since the olive oil forms the basis of the sauce.

Recipe:  (serves 2-4, depending on size)

1/4 cup good quality olive oil (or more if you aren’t watching the fat content)

6 garlic cloves, finely chopped

4-6 full sprigs of fresh rosemary (you can substitute basil, but I preferred the rosemary); removed leaves from at least 1 sprig to equal 1 tbsp; leave the others intact.

1 cup pattypan squash, sliced on the diagonal (to preserve the scalloped shape); or, 1 small zucchini, sliced; OR, one Asian long eggplant, halved and sliced thinly

1/2 whole cashews

1/2 coarsely grated parmesan or asiago

4 heirloom tomatoes (yellow or orange), seeds removed and finely chopped

generous pinch of fleur-de-sel or sea salt

Whole grain linguine, cooked

Instructions:

*Prepare the garlic, cheese, tomatoes and squash ahead of time, and have them arranged on plates or bowls – because this recipe goes really quickly. Make sure your tomatoes are seeded, but not peeled. You can seed them by slicing them in half and squeezing them gently, using a teaspoon to coax out the seeds. Chop them after seeding.

While your linguine cooks (according to instructions and whether you are using dry or fresh linguine), prepare your ingredients. Your pasta should be cooked, rinsed and draining when you start the sauce. Heat 2-3 tbsp of olive oil in a deep pan and add the garlic, tossing rapidly until it is softened. Next add the squash (or eggplant or zucchini) and 1 tbsp rosemary leaves, removed from the stem (leave it on the stem for a gentler flavour). If you are using the pattypan squash, you will need to toss it on medium heat for about 5 minutes. If you are using zucchini, I would stick to 2-3 minutes. Eggplant may require more time and more oil. Toss the squash and rosemary, and then add cashews, ensuring they are coated with the oil. For the very last minute of cooking, you will add your chopped tomatoes and another tbsp oil. At this point, you can also have a taste to see how powerful the rosemary is. If you feel it needs more, toss in another full sprig or two for 30 seconds, along with the fleur de sel. Remove the pan immediately from the heat and toss gently with the linguine, drizzling any remaining olive oil on top. Serve the pasta on plates, and add at least a tbsp of parmesan to each plate just before eating. You may also wish to have fresh cracked pepper and extra sea salt on the side. Enjoy!

Leave a comment

Filed under Vegetarian

A pizza alternative: Turkish tomato and kasseri cheese pide

Last weekend we had some friends over for dinner. We met them in Peru 8 years ago, on a GAP Adventures trip. They were from Toronto, too. They listened to CBC, didn’t vote Tory, and loved food – that’s enough in common to form a solid friendship, if you ask me! Having them over was exciting, because they are the kind of people who not only love to eat, but also love to cook, and can understand and appreciate the passion and energy that goes in to making a good meal – which is why we decided to go nuts with a Turkish meze. On the table: hummus, olives, labneh with marash pepper, vegetarian stuffed vine leaves, sigara boregi, mucvar (zucchini fritters), eggplant and pepper salad, shepherd’s salad, lamb kefta, garlic-mint yoghurt, tomato pide, and pomegranate – port gelato. Although I wasn’t pleased with the quality of jarred vine leaves used in the dolmasi, everything else went according to plan and effort, and we ate very well, chasing everything with wine, raki and chay (in that order).


We took the opportunity to snap photographs of our meze spread, and so I thought I would share the recipe for the tomato pide: everyone we serve it to seems to be really impressed, but it’s not all that hard to make. Pide is Turkey’s version of pizza. It’s made with a similar kind of dough, and then various toppings  are spread before it is folded over into a boat-shaped pizza, glazed with egg and fragrant nigella, and then baked. I have actually never eaten pide in Turkey. I have eaten greasy but delicious pide on the Danforth in Toronto, horridly greasy and tasteless pide in the Frankfurt airport, and succulent but rich pide in a lovely street-side Turkish restaurant in Vienna (which happened to be the highlight of my 2 days in Vienna…) So all of that is to say that I am not sure how authentic my pide really is. I have made a few modifications to a recipe in my favourite Turkish cookbook: “A Sultan’s Kitchen” by Özcan Ozan; namely, playing around with the dough and changing up the quantity of tomatoes. But what comes out of the oven is delicious, and something anyone could do at home if they just felt like having an alternative to typical pizza. The cheese you will need to use in this recipe is kasseri or kefyloteri. I prefer kasseri, a cheese found in Greek, Turkish, Macedonian and Bulgarian food. The kasseri cheese I buy from Highland Farms is usually from Bulgaria. It’s a sheep’s cheese, which makes this pide really good for lactose-intolerant people, but if you don’t like the taste of sheep’s dairy, you could always do a half-and-half mix with mozzarella. Kasseri cheese is delicious, and not as expensive as kefyloteri.

Recipe (makes 2 large pide):

Dough:

3-4 cups “00” tipo fino flour (or all-purpose)

4 1/2 tsp Fleischmann’s pizza yeast (or instant yeast)

3 tsp sugar

1 tsp salt

1 1/3 cup warm milk (or water, if lactose intolerant)

4 Tbsp olive oil

Sauce:

1 Tbsp olive oil

1/2 cup minced Spanish onion (or vidalia)

4 minced garlic cloves

1 bay leaf

1/3 cup tomato juice

400 mL (1 regular sized can) of imported, chopped San Marzano tomatoes

generous pinch of Turkish paprika (optional)

Topping:

grated kasseri cheese (approximately  1 cup, but to your taste preference)

1 tsp dried oregano

1/2 tsp Marash pepper, or substitute Aleppo pepper or crushed chili pepper flakes

1 tsp ground cumin

salt to taste

1 egg, lightly beaten

2 tsp nigella seeds

2 tsp toasted sesame seeds

sea salt (optional)

Instructions:

Start the dough before the sauce. If you are using pizza yeast, it should take about 30-45 minutes to rise. Preheat your milk to a warm – but not hot – temperature. Mix 2 cups of the flour in a bowl with the yeast, sugar and salt. Stir in the warm milk and blend with a wooden spoon. Add the olive oil and continue to mix until you have a smooth mixture. Begin adding the remaining flour. You will need to get rid of the spoon and use your hands now: fold in the flour about 1/4 cup at a time and knead. Stop adding flour when you have a soft, warm and moist dough that is not too sticky but not too dry. Form a ball with the dough and leave it to rise for about half an hour, covering the bowl with a dampened tea towel.

Meanwhile, start your sauce. Heat the olive oil and add the onion, stirring for about 1 minute. Add the tomatoes, garlic, bay leaf, tomato juice and paprika (if using). Bring the mixture to a boil and then simmer for 10 minutes. Turn the heat off and leave covered until ready to use.

Grate the cheese and set aside; mix the spice topping in a bowl and set aside.

When the dough has risen to about double in size, and pressing on it leaves an imprint, it is ready. Punch it down, role it out into 2 long oval shapes instead of your typical round pizza shape. Set them on your baking sheet or pizza stone (I always do this on a pizza stone; just make sure to spread cornmeal over the stone, first – and keep in mind a stone is only able to handle one pide at a time, so you will have to do two batches).

Spread the sauce over the dough, leaving an edge of about 3-4 cm all the way around. Sprinkle the grated kasseri cheese over top (you do not need to cover the pide as you would with a pizza). Now, fold in the edge and pinch together the two ends so that you have a boat shape. Using a pastry brush or soft spatula, spread the egg mixture generously over the edge of the pide. You can drizzle any leftovers in between the cheese if you wish, but I usually do not. Sprinkle the nigella and sesame seeds liberally over the glazed edges.

Put the pide in the oven for approximately 20 minutes, or until the edges of the pide are a dark, golden colour. Remove the pide and then evenly sprinkle the spice mixture on top (I find a tea strainer works really well with this, as long as your oregano is crumbled finely enough).

It is ready to eat, and can be sliced in long, diagonal strips. * If you only want to make 1 pide at a time (one pide will serve two as a main, or 4 as a side dish) you can freeze the tomato sauce, and just cut the dough recipe in half. The spice topping can be stored for several weeks in an airtight container.

Leave a comment

Filed under dinner, Turkish, Vegetarian

Pumpkin is not just for Autumn: Caribbean Pumpkin – Coconut Soup

The funny thing about pumpkin (or squash) is that people seem to associate it with autumn and winter – myself included. It’s all because of those memories we have of Thanksgiving dinner – the pumpkin pie and the roasted acorn squash (okay, and I guess the fact that it is harvested in autumn plays into it as well) -that we think it should be something consumed ravenously in the cold seasons and then abandoned as the asparagus hits the supermarkets in Spring.  But truth be told, some of my best pumpkin recipes come from places where there is no autumn – Jamaica, Mexico, Thailand, Goa, to name a few!

The past summer we were discussing pumpkin with our Australian travelling companions in Ukraine. We were talking about the subtle differences in food names between Australia and North America. For example: cilantro is known as fresh coriander in Australia, whereas in Canada, coriander is only in reference to the ground seed. We also learned that what we in Canada call ‘squash’ they call pumpkin, and what they call ‘squash’ we call zucchini. With the help of wifi and an iPad, we were able to pull up pictures and confirm with one another these very important reference points around the world of pumpkin and squash and possibly avert a war.

The recipe I want to share today is born of our recent trip to St. Lucia. We were staying in the overly touristy enclave of Rodney Bay, in Gros Islet and cooking for ourselves and our friends each night. Most of our ingredients came from the IGA next door, but there was one lady who would set up a table off the “highway” each day, selling produce directly from her farm. We decided on our last night of cooking, that we would whip up something completely local. The only thing we had to buy at the supermarket was locally produced ‘Viking’ brand coconut milk, St. Lucian made curry powder, and dried thyme. The rest we were able to buy from this lady on the highway. We watched as she hacked into a giant pumpkin with a machete to pull apart a substantial wedge for us and then split a coconut open, its water gushing all over the ground. We packed a bag with ginger, garlic, onions, yams, potato, cilantro and fresh limes, walked across to the fish market to buy some fresh catch of the day (kingfish and grouper) and returned to our villa overflowing with excitement. Cooking with ingredients this fresh in March is a real thrill – the limes from her garden (much like the lemons and grapefruit we bought) were so fresh that you could smell them from the second floor as Michael sliced them open. The fish had been caught that morning. What a feast we had. Listening to bossa-great Jaobim on my iPod, the fresh trade winds blowing in from the Harbour, it was a perfect evening (I realize that bossanova isn’t exactly Caribbean, but it sounds like the sea, so it counts). While Michael prepared the fish, I cooked up the soup and roasted wedges of sweet yams in olive oil, sea salt and fresh thyme. The only thing better than cooking it all up, was sitting under the stars by the water, with good friends, enjoying the fruits of our labour.

The pumpkin soup recipe I am sharing here is exactly what I made on a whim in St. Lucia – except that I cannot find those huge Caribbean pumpkin around here, so I have substituted a kabocha squash. I also used reduced-fat coconut milk – I can only justify the decadence of full fat coconut milk when on vacation. This recipe is fast and easy to make, and absolutely not an autumn-only meal! It was 36 degrees when we enjoyed it in St. Lucia, and 5 degrees when we enjoyed it in Mississauga (obviously only one of those meals was eaten outdoors!)

Ingredients:

Sunflower or olive oil

1 onion, chopped

3 garlic cloves, chopped

1 inch ginger, grated

1 red bird chili, diced (optional – if you don’t like spice, omit)

1 russet potato, peeled and chopped into cubes

1 kabocha squash, peeled and chopped into cubes

1 to 2 tsp dried thyme

1 bay leaf

2 tsp Caribbean curry blend (Trinidad or Jamaican is most common here)

2 cups vegetable stock

1 can coconut milk, reserve two tablespoons of the thick cream from the top

Juice of one lime

salt to taste

Topping:

2 tbsp cilantro, chopped

2 tbsp grated fresh (or dried) coconut

1 tsp palm sugar or brown sugar

1 tsp grated lime zest

Heat the oil in a soup pot and add onions, garlic, ginger and chili pepper (if using). Stir frequently until onions are soft. Add the potato and squash and toss frequently for one minute, then add thyme and bay leaf. Reduce heat and cook for a few more minutes, then add soup stock. Bring to a boil (you may have to add more water or stock if the squash isn’t adequately covered).  Add the curry powder, lower heat and simmer until the potato and squash are tender. Meanwhile, prepare the topping: mix the cilantro with the coconut, sugar, lime zest and half of the lime juice, and set aside. When the potato and squash are ready, transfer the mixture in small batches to a blender and puree until it is smooth. When all of the soup has been pureed, return it to the pot and add the coconut milk, stirring gently over low heat until warmed. Ladle the soup into bowls, then use a tablespoon and scoop up the reserved coconut cream, drizzling it over the soup. Put a teaspoon or two of the lime topping in the centre, and enjoy a taste of the Caribbean – in whatever season it happens to be!

Leave a comment

Filed under Soup, Vegetarian

Low-fat Thai Pumpkin Soup

I absolutely love pumpkin, and when I realized that it features prominently in many Thai dishes, I got even more excited. It was a few years ago that I first tasted Thai pumpkin soup at JJ’s in Streetsville. It was one of those “so good but so bad” moments. The soup was thick, creamy, spicy and aromatic – that perfect combination of sweet, sour, salty and spicy. But I knew it was loaded with full-fat coconut milk – it was like eating a bowl of cream.

Over the years, I have experimented with different recipes for Thai pumpkin soup, making cuts here and there, and I have come up with a low-fat version that meets all of my criteria for taste – but doesn’t leave me feeling guilty. Unlike many of the versions you might find in a Thai restaurant, mine is blended. This allows me to make a big pot and freeze it for a warming work lunch later in the week or month. Although every recipe I’ve ever came across warns not to use ‘low fat’ coconut milk, I ignored their warnings and went ahead with my experiments, confirming my suspicion that a switch to reduced fat coconut milk would eliminate nothing other than fat.

This recipe does require a few Thai ingredients that you wont find in the Asian aisle at a supermarket like Loblaw. You will have to head to T&T, Oceans, or another Asian supermarket. But the good news is that Thai chilis, lemongrass and kaffir lime leaves can all be frozen, so you’ll only need to go out once. (Just make sure to wash and package them in freezer-grade ziplock bags when you come home). Do not try to substitute any of these ingredients – they are essential components. I have seen people blogging about how they substituted lime juice for the lime leaves, or jalapenos for the Thai bird chilies. This is counterintuitive. Lime leaves have nothing to do with lime juice – so you can’t swap them. You’ll end up with a Mexican pumpkin soup instead (which, come to think of it, might not be too bad  – but that’s not the point of making Thai pumpkin soup!)  Fish sauce and shrimp paste are absolutely necessary, too, if you want that authentic Thai flavour.

Ingredients (serves 4-6)

4 cups good quality vegetable or chicken stock

2 shallots, sliced in rings

1 stalk of lemongrass, either minced or bruised (I hate finding tough chunks of lemongrass in my blended soup, so I usually cut the stalk in half and bruise it, pulling it out just before blending)

1 thumb sized piece of galangal, grated or thinly sliced

A picture of galangal - as it comes packaged from the supermarket

3 cloves garlic

2 Thai red chilies (seeds removed)

3 kaffir lime leaves, whole

1 butternut squash, peeled and chopped

1/2 tsp turmeric

1 tsp cumin

1/2 tsp coriander (ground)

Lemongrass in packaging

2 tbsp fish sauce

Kaffir lime leaves in packaging from T&T

1 tsp shrimp paste

1 tsp palm sugar, grated (or substitute brown sugar)

1 can reduced-fat coconut milk

1 lime, juiced

generous handful of Thai basil leaves, washed and stemmed

Instructions:

Bring the stock and the shallot, lemongrass, garlic, galangal, chilies and kaffir lime leaves to a boil. Once boiling, reduce to medium heat and add the chopped butternut squash. Simmer until squash is tender.

Add the dry spices one at a time, stirring in between, then add the fish sauce and shrimp paste. Allow to simmer for a few minutes. Remove the lime leaves (and the lemongrass if you used a whole, bruised stalk).

Stir in the coconut milk slowly. (Before pouring the coconut milk, you might consider reserving some of the thick cream – say, 3 tbsp – that has risen to the top of the milk. You can drizzle if over the soup later, as an attractive garnish. This would be pointless if you intend to freeze the soup or eat it at a later time).

At this point, if you intend to serve the soup fresh, you should blend the soup in batches, returning it to the pot to reheat. Just before serving it, add the lime juice to taste: begin with 1 tbsp and add up to 3 tbsp according to your personal taste. You may also have to adjust the fish sauce. The soup should have a perfect balance of sour and salty – with neither flavour overpowering the other. Chop the basil leaves and garnish each bowl of soup.

***If you plan on freezing the soup then I recommend adding the basil before blending. Return the soup to the pot and add lime juice, adjusting fish sauce as necessary.

Leave a comment

Filed under dinner, Gluten free, Soup, Thai

What to do with your Mayan Heirloom Squash

(Because I know you were wondering, right?) Do you have some Mayan squash kicking around? We were at Costco (of all places) and found a bag of Mayan heirloom squash, and boxes of Mayan sweet onions. Although I recognized the onions as being an essential ingredient in the famous Yucatan soup – Sopa de Lima, I had never seen this variety of squash before. We looked at each other and nodded, placing a bag of the pretty little green squash in our oversized Costco cart. Who would think a trip to Costco – and all of its inherent stresses and annoyances – would result in a gourmet meal?

I looked up the squash online and found very little about it, other than a few blogs from foodies in the US who, like me, had picked up a bag of the squash at Costco or Sam’s Club. What I did learn from their blogs was that the squash were similar to zucchini and could be eaten in much the same way. The tag on the squash gave basic instructions on how to steam, microwave or saute the little guys, but I had a desire for something a little more exciting. I decided to stuff the squash, and set to work throwing wholesome and filling ingredients into a pot. A pure, honest experiment with next to no planning. And what a treat these little guys turned out to be. I immediately regretted my decision to terminate my burdensome Costco membership – it would be worth the $70 just to get my hands on these babies again. Okay – that’s a bit of an overstatement, but really, they were that good.

I agree with the other blogger that they are best compared to zucchini, but their taste was sweeter and deeper than a zucchini which can sometimes taste a little bland, especially at this time of year. Baked in the oven they were perfectly al dente – not too mushy, not too crunchy. We ate the peel and all, and they maintained their pretty little shape throughout the entire process.

If you don’t have Mayan Squash on hand – get thee to Costco and buy some! Or…you could easily do this with zucchini. There are a few ingredients you might not have – I am thinking of the epazote, especially (an herb from Mexico, common in traditional Mexican cooking) – but I don’t think that you need to be deterred from making these. You can easily skip the epazote.

Ingredients:

8 Mayan heirloom squash, cut in half
1 cup quinoa (red, black or white – or a mix)
1.5 cups vegetable soup stock or water
1 generous pinch of dried epazote (optional)
1/2 tsp fennel seed
1/2 tsp cumin seed
1 onion, finely chopped
3 garlic cloves, minced
1 tbsp sunflower oil
1 carrot, finely chopped
1/2 red pepper, finely chopped
1 generous pinch of cinnamon
1 generous pinch of chipotle chili pepper
2 tbsp roasted pumpkin seeds
Juice from 1 lime
2 tbsp minced fresh cilantro

Instructions:
Bring the quinoa and vegetable stock to boil with the epazote (if using) in a small pot. Reduce to a simmer and cook for 15 minutes. Meanwhile, use a paring knife and scoop most of the flesh of the squash from the halves, reserving both the shell and the flesh. Chop the flesh. Then heat 1 tbsp sunflower oil in a frying pan. Test the oil by dropping a cumin seed in the centre; if the oil is hot enough, the seed will sizzle and start to “swim” in the oil. Add the remaining cumin and fennel seeds. Saute for just under a minute and then add the garlic and onion and toss until the onion softens. Add the carrot, peppers, cinnamon and chipotle and continue to cook until the carrot is just barely soft. Add the chopped up squash flesh. When the quinoa is cooked, add it to the fry pan and mix in juice of half of the lime. Add the pumpkin seeds and toss to distribute. Grease or spray a lasagne dish and line the squash shells up in the pan. Using a large spoon, scoop the filling into each shell and gently press to pack it. Sprinkle the cilantro on top, and then mix the remaining lime juice with a few tablespoons of water and pour it gently around the squash (being careful not to pour it over the squash). Bake the squash in the oven at 400 degrees for approximately 25 minutes and then remove and enjoy – sour cream or creme fraiche is an optional but delicious accompaniment. By the way, there will be lots of left over quinoa mixture, and it makes a perfectly delicious salad to take for lunch!

Leave a comment

Filed under dinner, Gluten free, Vegetarian

Pad Thai that wont tip the scales

After the holiday season, it should come as no surprise that I would be posting a recipe for something healthy. It is not my new year’s resolution to eat more healthy because I generally do (except at holiday season); but it is my resolution to update my blog twice a month instead of these ridiculous gaps in time – let’s see how that goes!

A month ago, I posted a ‘food update’ on facebook as I was preparing my fair trade, organic pad thai, and I had a few people request the recipe, so I thought it would be a fitting post for the start of 2012. I have tasted a lot of pad thais, without having ever  tasted pad thai in Thailand. Who doesn’t love sinking a set of chopsticks into that spicy pile of noodles? While I have no idea if this is how they do it in Thailand, I can definitely say that what I’ve never liked is the amount of oil used to cook Pad Thai – no matter where I eat it in the rest of the world. So I set about trying to create my own healthier version by playing around with proportions from a very traditional Thai recipe. What follows – be warned – is a significantly fat-reduced meal. Don’t expect the usual puddles of chili-infused oil on your plate! You can, however, expect to taste the quintessential aromatic Thai flavours without tipping the scale.

A word about ingredients: I am not a believer in substitutions (except occasionally in baking). When it comes to International cooking, I find that the effort you put into finding the right ingredients is worth it, because you will end up with ‘the real thing.’ So in that vein, I must caution you not to substitute regular basil for Thai (holy) basil. Although related, the flavours of both plants are very different, and it is the holy basil that gives Thai cooking that unique….well, “Thai” flavour. However, in my efforts to create a more figure-friendly Pad Thai, I did end up substituting one key ingredient: instead of soaking tamarind in boiling water (as is normally done), I decided to use Indian tamarind sauce (they kind you often put on samosas). My reason for this was less about cutting corners and more about creating a fluid sauce without the use of copious amounts of oil. It works quite well, without changing much of the flavour of the dish. Just make sure you have a pure tamarind sauce – not one that’s mixed with other flavours.

Although this recipe cannot be totally vegetarian – due to the use of fish sauce – you can choose to use tofu instead of chicken, but be forewarned that you will probably have to add more oil when frying if you do not use chicken. If you do opt for chicken, you have another decision to make: chicken breast = healthier; chicken thighs = more decadent. If you do opt for breasts, be warned (again) that you might have to add oil as the chicken is cooking. You can also add shrimp to this recipe; since I do not eat seafood, I do not include it here. The vegetables I have included are bean sprouts (essential) and snow peas. You can also use red peppers, julienned carrots or eggplant if you so desire. I usually don’t use green peppers – I find them bitter and overpowering when cooked.

As for fair trade? Well, that was a random but serendipitous occurrence when I last made Pad Thai. I discovered that I had purchased a bag of fair trade, organic brown rice vermicelli at Highland Farms – in addition to the fair trade palm sugar I had on hand. The Pad Thai noodles were made of brown rice, which is even healthier. Here is a link to the product information for King Soba’s fair trade vermicelli:

http://www.kingsoba.com/organic-fairtrade-pad-thai-noodles.php

And with no further ado, I present…Pad Thai (lower fat version)

Ingredients: 

10 oz Phad Thai vermicelli (flat rice noodles)

3 T peanut oil (or sunflower oil)

3 shallots, sliced in rings

1 minced garlic clove

1-2 Thai bird chillis (red or green), seeds removed and chopped

2 chicken breasts (or 4-5 thighs) deboned and sliced

2 eggs, lightly beaten

1 cup bean sprouts, thoroughly washed and drained

1 cup snow peas, stemmed

1 cup loosely packed holy basil leaves

1/4 cup peanuts, lightly crushed

1 lime

For the sauce:

2 tbsp fish sauce

1 tbsp fresh lime juice

2 tbsp palm sugar (*sugar from coconut palm. Substitute muscovado or brown sugar if you can’t find it. Palm sugar is available at Asian groceries, the Bulk Barn and health food stores)

3 tbsp Indian tamarind sauce (from Indian grocers or large supermarkets)

1-3 tsp Thai Sriracha chili sauce

Instructions:

Place the vermicelli noodles in a large bowl and cover them with cold water, leaving them to soak for approximately 45 minutes. Next, combine sauce ingredients in a small measuring cup and mix well; set aside. When noodles are almost done soaking, begin cooking. It is best to have all of your ingredients ready to go; the cooking phase goes very quickly and leaves little time for chopping in between. Heat the peanut oil in a large wok and add shallots, garlic and minced chilies. Toss for one minute maximum. Add chicken (or tofu) and continue to toss in the pan for 2-3 minutes or until chicken is browned. Push the chicken and shallots off to the side of the pan and add the eggs, using a spoon or chop sticks to scramble them as you would with scrambled eggs. When the eggs are cooked, mix them in with the chicken. Add the bean sprouts and snow peas and mix well, cooking for about 3 minutes. Drain your noodles, leaving a bit of water clinging to them, and add them directly into the pan, followed by the reserved sauce. Stir carefully to ensure that all noodles are covered with the pad thai sauce. When the noodles are soft and tender and the chicken is cooked through, add the holy basil and toss through for approximately one minute, until the leaves are slightly wilted. Serve the pad thai immediately, garnished with peanuts, some extra basil leaves, and a wedge of fresh lime. If you like your pad thai really hot, you can always add more sriracha chili sauce. Enjoy!

Leave a comment

Filed under dinner

Turkish Lentil Soup – Version 1

There are some places on the planet that are havens for vegetarians, and Turkey – in spite of its sizzling kebabs, stews and shaved meats – is one of those places. Fresh vegetables, yoghurts, cheeses, pulses and grains form the basis of many great Turkish dishes, and perhaps one of the best known of these is Turkish lentil soup.

I ate lentil soup all over Turkey – the good and the bad – and had a particularly memorable one in Goreme, in the Cappadocia region. But perhaps the best version I have ever had was at the Restaurant Su, a Turkish restaurant in Montreal, during a recent trip. Pale, creamy and fragrant, it  was generously drizzled with paprika-infused butter and served with a juicy wedge of lemon, and I revelled in the delicious simplicity of a soup that transported me to a street-side bistro in Istanbul.

There are actually a number of different lentil soups in Turkey, and I had been making a version with tomato, bulgur and mint for a few years. But there was something light and delicate about the flavours of this simpler version – known as mercimek çorbasi – that I wanted to re-create. You can find a million recipes on the internet, and some strike me as rather bland, while others seem a bit to0 complex for what it should be. This recipe follows a pretty standard method, although I have added a few flavours that are common to most Turkish soups.

A couple of pointers on the ingredients. The soup is only as good as the ingredients you use. Sadly – for the strict vegetarians out there – I actually find the flavour more authentic when made with chicken stock over vegetable, but vegetable stock will suffice. (I use Pacific foods organic chicken stock in mine). Also, the mint must be dried in this one – do not use fresh mint leaves. Dried mint imparts a flavour that is very different from fresh mint. Finally, use a good quality paprika. I use Turkish paprika, but if you don’t have access to this, use a good quality Hungarian paprika. Whatever you do, do not use margarine or vegetable oil. Butter is essential for the drizzle at the end, and I find that butter used to fry the onions leaves a very delicious taste. But if you don’t want to use butter, substitute only olive oil. This soup goes so well with a crusty olive bread or a chunk of baguette to sop up the last drops in the bottom of your bowl. Enjoy it with feta cheese, fresh tomatoes and olives on the side for a full Turkish-style lunch.

Ingredients (serves 4-6)

Olive oil or butter

1 onion, diced

1 clove garlic, minced

1 medium potato, chopped (most recipes use more for that classic pale colour and creamy texture after blending, but I am trying to keep the carbs lower in mine)

1 carrot, peeled and chopped

1 tsp cumin seeds

1 tbsp tomato paste

1 cup red lentils, washed and picked over

1 litre chicken or vegetable stock

1/2 tbsp dried mint

1  lemon

For topping: 2 tbsp butter, 1 tsp paprika, 1 tsp dried mint, sumac (optional)

Instructions:

Heat butter (preferably) or olive oil in a large pot and then add onion and garlic and fry gently for 2 minutes. Add the cumin seeds, carrot and potato and continue to fry for another minute or two. Add the tomato paste and stir until it is coating the vegetables. Pour in the stock with the lentils and bring to a boil. When potato, lentils and carrots are soft, after about 20 minutes at a light boil, allow the soup to cool slightly and then puree it in batches using a blender. Return the soup to the pot and add mint and the juice of 1/4 – 1/2 lemon (start with less, and then taste and add until you are satisfied with the results). Just before serving, melt the butter for the topping and add the paprika and mint, swirling it around for a few seconds until blended. If it’s too thick to drizzle, add more butter or olive oil. Pour the soup into bowls and then drizzle with about a teaspoon of the butter-paprika mixture. Optionally, you can add some dried sumac or aleppo pepper on top, as well. Serve with a chunk of lemon and be transported to the Mediterranean!

Leave a comment

Filed under Vegetarian

Spanish-Inspired Omelettes with Green Olives and Manchego Cheese

I love manchego cheese. Ever since we ordered a plate of hot manchego cheese drenched in olive oil on a patio in Seville, I have been in love with it. Manchego is made of sheep’s milk, but is relatively hard and sharp, so it’s good for people who are lactose intolerant. The down side of this is that sheep’s cheese has a higher fat content, so if you are watching your fat intake, you have to have some pretty amazing self-control – because once you taste it, there’s usually no going back. I used to have to go to St. Lawrence Market to buy a very expensive wedge of manchego, but it is finally starting to make its way into Canadian supermarkets at various stages of aging (and subsequent pricing). Obviously the more aged it is, the better (in my humble opinion) but I once paid $18 for a wedge of ten-year manchego from the market, and that’s just not a reasonable everyday expense.

Today I am going to share a simple omelette recipe that uses a small amount of manchego. For this omelette, I used a 3-year manchego (which, from what I understand, is a pretty “young” cheese), some good quality sweet paprika, and some brine-packed green olives.  Highland Farms sells various imported manchego cheeses at reasonable prices, and that’s the only real “exotic” ingredient required. Just make sure you don’t use olives from a can. Buy them fresh from the olive/antipasto counter, or buy Unico brand, which packs their olives in brine. The recipe serves two, but the omelettes could easily be cut into smaller wedges to serve 6 as a breakfast side.

Instructions: (for two omelettes) 

Olive oil

1/4 cup spanish (red) onion, finely diced

1 garlic clove, minced

1/2 red pepper, finely chopped

1 cup mushrooms, finely minced

pinch of oregano

pinch of rosemary

3 eggs

1/3 – 1/2 cup low-fat milk

6 brine-packed or fresh jumbo green olives, pitted and finely chopped

pepper to taste

30 grams grated manchego cheese

2 Tbsp parsley, minced

1/2 tsp paprika

 Heat a pan with a small amount of olive oil and fry the  onions, pepper and garlic for 1-2 minutes. Add the  mushrooms, oregano and rosemary and continue to cook  until mushroom is browned and tender. Remove all contents  to a plate and set aside. Meanwhile, crack eggs into a bowl and stir in the milk. Add the chopped olives and pepper – do not add salt because there is more than enough salt on the olives. Heat a medium sized non-stick pan and pour half of the egg mixture into the pan, swirling it rapidly to ensure it spreads evenly. Allow it to cook at low-medium heat about  3 minutes until most of the liquid in the mixture is cooked. Add half of the mushroom and pepper mixture to one half of the omelette, then top with half of the parsley, paprika and cheese. Fold the empty half of the omelette over the half with the vegetable mixture and allow to cook for 30 seconds; gently flip the omelette for another 30 seconds, then serve sprinkled with pepper, paprika and parsley (optional).


Leave a comment

Filed under Breakfast, Vegetarian

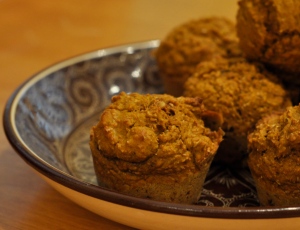
Pumpkin Bran muffins with a Moroccan twist

We woke up to fall yesterday. Suddenly. After a month of warm, late summer days and gorgeous September skies, October arrived as though to say “alright, enough of this. It’s time to let go.” And let go we did – we had little choice. I was downtown last night, my feet aching as my toes were forced to scrunch up inside shoes for the first time, and I honestly wished I had wooly mitts and a scarf! With fall comes not only closed toed shoes, but a sad farewell to peaches and figs, to my local farmer’s market and my beautiful window boxes full of vines and flowers.

There are, of course, a few happy things about fall: crimson and orange leaves, deer encounters in the woods, pulling out my scarf collection, and of course, pumpkin – one of the greatest root vegetables on earth.

With the coming of fall, I have decided to hibernate indoors today to bake and cook.  Now, I always make muffins on Sunday morning: much like my Saturday pancakes, it has become a tradition in this house of two. But this week called for something different from the banana or blueberry-oat muffins I’ve been whipping up lately. It’s time – at last – for pumpkin.

These are very healthy and very low-fat muffins. There is no added oil or butter. What that means is that they wont last as long as muffins that are full of oil. If you can’t eat them all in two days, I suggest freezing them – otherwise they will dry out. I find that most muffin recipes call for at least 125 ml of oil or butter (that’s half a cup) and although it makes for a very moist muffin, it also makes for a very fattening muffin. I simply don’t use oil or butter at all. But you can feel free to adjust the recipe if you want some oil in there – simply replace part of the apple sauce with an equal amount of oil. In this concoction, I decided to get a bit adventurous and use Ras-el-Hanout. This is a Moroccan spice blend that I love – it’s made of anywhere from 8 -12 spices – and a friend of mine brought me back a huge supply from Marrakech that I need to eat my way through. I was very happy with the hint of savoury cumin and coriander mixed in with cumin, cloves, cardamom and allspice. But if you don’t have (or want) ras-el-hanout, pumpkin pie spice blends will work just as well. If you don’t have a pumpkin pie spice mix, simply use 1/2 tsp cinnamon, 1/8 tsp ground cloves, and 1/8 tsp allspice. I also used Splenda brown sugar – mainly because my husband does not like sugary-sweet things. If you want to use Splenda, use a scant 1/4 cup instead of 1/3 cup. If you are using regular brown sugar, you can increase to 1/2 cups for a sweeter muffin.

Ingredients (for 12 muffins)

(Preheat oven to 375 degrees)

1/2 cup whole wheat flour (or whole spelt – as I used)

1 cup all-purpose flour

1 cup wheat bran

1/3 cup brown sugar

1 tsp baking soda

1 tsp baking powder

3/4 tsp Ras-el-Hanout (or pumpkin pie spice)

1 cup pumpkin puree (canned or fresh – make sure it is not already spiced if you are using a canned puree)

1/3 cup milk

1 egg white + 1 egg (or use two eggs)

1/2 cup apple sauce

6-8 pitted dates, chopped finely (optional)

2 tbsp hulled pumpkin seeds/pepitas (optional)

Instructions:

In a large bowl, mix the flours, bran, sugar, spice, baking soda and baking powder. Blend well using a fork or a whisk. In a separate bowl, stir the pumpkin, milk, apple sauce, egg whites and egg until blended. Add the wet ingredients to the dry and mix well with a fork. Stir in the chopped dates and pumpkin seeds (if using) and then scoop 1/4 cup of batter into each muffin cup. Bake for approximately 20 – 25 minutes and allow to cool for five minutes. Remember to freeze the muffins if you are not eating them within two days.

Leave a comment

Filed under Vegetarian